Who it works for
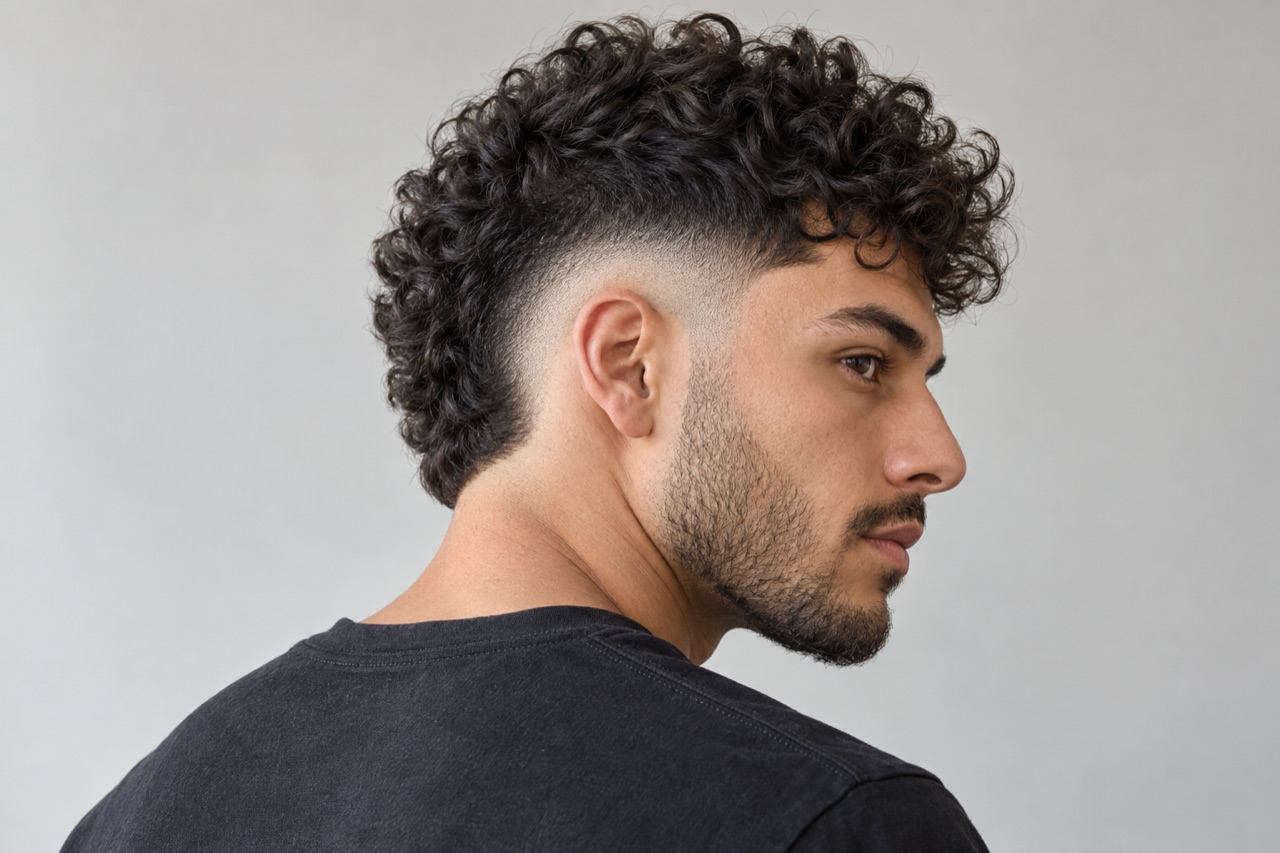
Consider it if you want a visible side detail and are comfortable with a haircut that reads clearly from the profile. It pairs especially well with curls, coils or a textured top because the rounded fade frames that volume. If you need a conservative, uniform silhouette from every angle, the arc may feel too graphic and a low taper may be easier to live with. If you want a stronger change, first decide how much length and scalp exposure you are comfortable with rather than assuming shorter always looks cleaner. Whether you blow-dry, wear a cap or helmet, and can return for edge cleanup all affect the practical fit. Texture and cowlicks are cutting conditions to work with, not flaws that must be hidden.
How to choose
Check how far the curve expands above the ear and whether the back edge connects to a mullet-like tail. A tight arc keeps attention near the ear; a higher, wider arc alters more of the side. Compare a front view for temple balance and a rear three-quarter view for the neckline—the side selfie alone hides an important part of the shape. Put the reference beside your own front, side and back views and compare the outline, fringe or hairline boundary rather than the model's facial features. Pick the closest structural change, then decide how much daily styling and grow-out effort you are willing to accept.
Before the appointment
Show the barber the exact ear-centered arc and state whether the nape should remain compact or extend into a tail. Specify the top's texture and length independently, then ask the barber to sketch or indicate the curve before removing hair. Bring side and rear references with similar ear placement; a dramatic editorial angle can exaggerate how high the fade travels. Save one image you like and one counterexample, and be ready to explain the exact difference. Before the cut, confirm the dry length, wash-day direction and sections that must remain. An AI preview helps compare visual directions; it cannot replace a real consultation or establish a barber's cutting plan.
Living with the look
The arc is a design line, so it becomes less distinct as the hair above it grows. Curls at the top may need moisture and shape definition while the faded area needs only routine cleanup. Think about how often you want the curve restored, especially if the look depends on a crisp outline for photos. The top and fade may need different maintenance rhythms. Daily care should support the actual burst fade structure, not reproduce a photographed finish. Start with a small amount of a tool or product suited to your texture; if one side grows faster, clean up that area instead of shortening everything. Set a trim rhythm by how crisp you want the outline to remain, not by a universal schedule.
Real limitations
A burst fade is not interchangeable with a taper or a standard drop fade: the curve is specifically concentrated around the ear. Its appearance depends on head shape, ear position and how much top volume sits above it. Very short tops can make the arc dominate; long hair can cover it. An AI preview cannot guarantee exact blending or barber execution. A real result also depends on length, growth direction, curl spring, head shape and the person cutting it. AI cannot guarantee a haircut or chemical service, or predict the exact result after washing, humidity or a full day. Treat the preview as a communication sketch; base the final plan on your own hair and an in-person assessment.
Mistakes to avoid
Avoid showing a burst fade with a pronounced tail if you want a simple ear curve and no length at the nape. Also do not use a front-facing image to judge a cut whose signature is at the side. Name the arc height, back connection and top length explicitly; otherwise two people can say 'burst fade' while picturing different shapes. Another common mistake is naming the cut without specifying its top, edge and side treatment. Before deciding, repeat back the version you chose, how much time you will spend styling it and which length must stay. A polished reference photo is a starting point for questions, not a promise of identical hair.