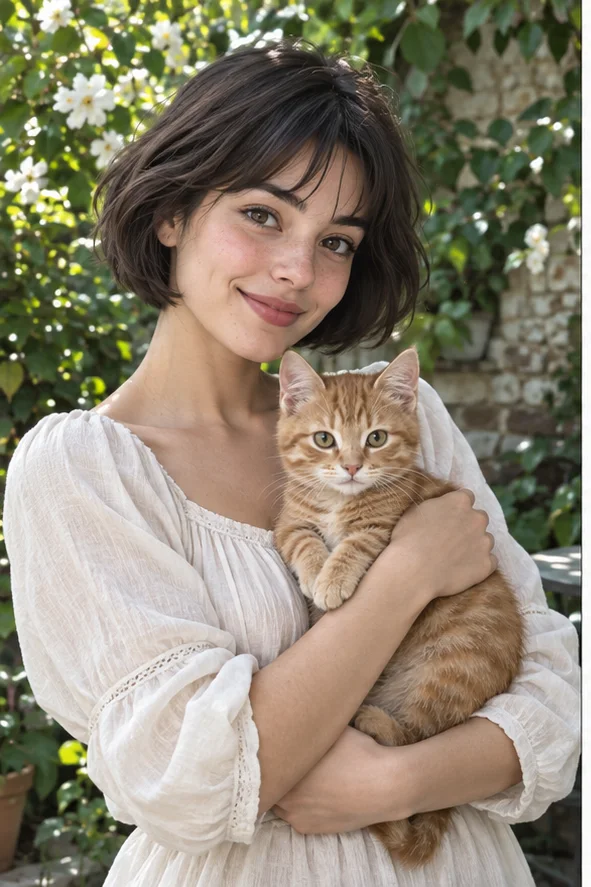
Make a playful profile image or a stylized picture of your pet using visible color blocks. Start with a simple photograph, look at the illustrated differences, then open the creator with pixel art selected. This is AI redrawing in a pixel style, not a precise grid converter, a pixel editor or an automatic game-sprite exporter. That distinction matters before you spend credits.
Style illustrations, not verified before-and-after outputs from the live tool. They show a visual direction; your photo may produce different colors, likeness and details.
Want a retro illustration or an exact pixel grid?
Choose this flow when a recognizable, playful reinterpretation is more important than controlling every pixel. If you need exactly 32 by 32 cells, a fixed palette, numbered bead patterns, transparent sprite edges or animation frames, use a dedicated converter or pixel editor. The example shows stepped color shapes and simplified features; it does not prove that every mark is a uniform, editable cell. AI can change the face, pose and small objects rather than merely downsample the original.
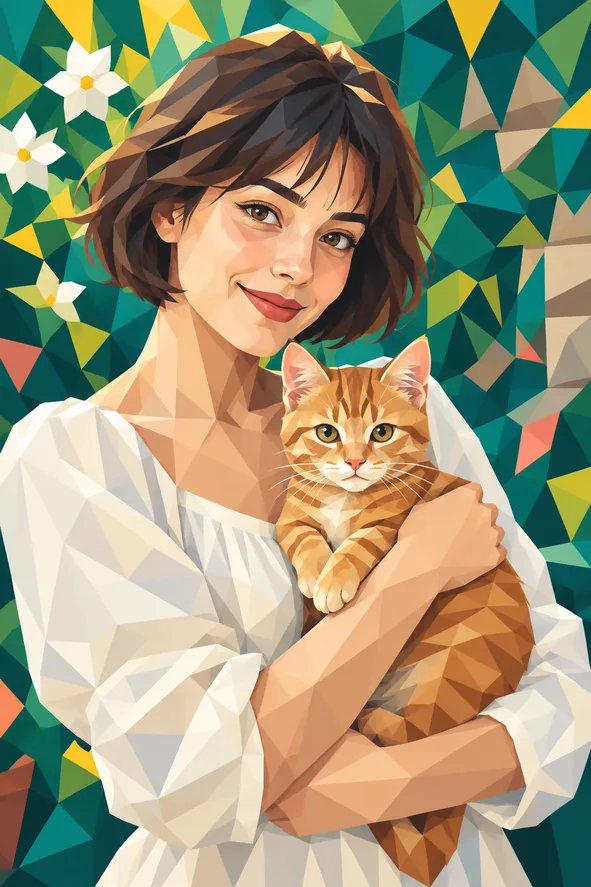
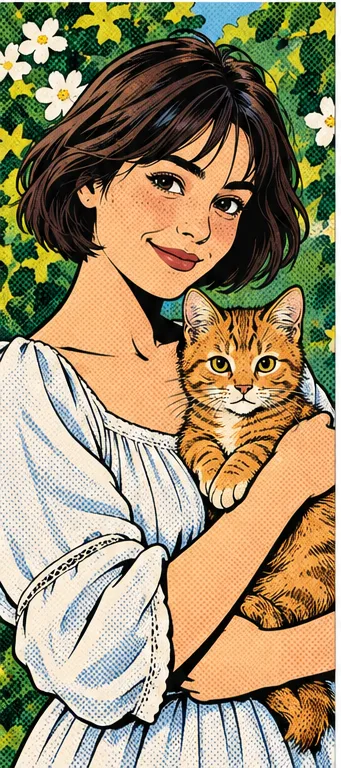
Pixel blocks are not triangles or comic dots
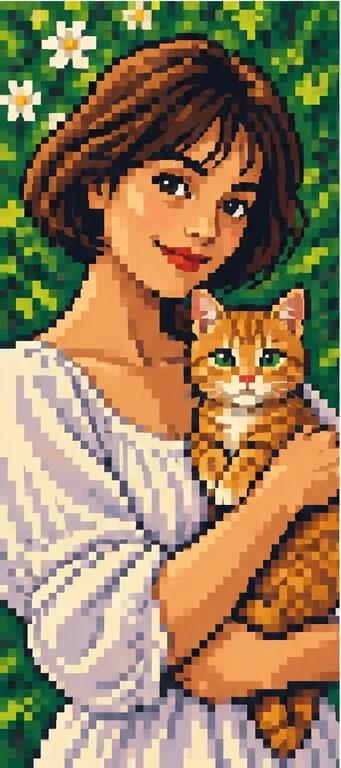
Our three illustrations use a common reference subject. They explain visual structure, not a ranking or same-photo generator benchmark. Compare hair edges, sleeve shading and the cat's face.
Pixel style: stepped blocks
Square-looking color clusters build the hair, sleeve and cat. Choose this for a retro-looking avatar or decorative picture. Check block sizes and whether key features survive at a small display size. Visible blocks alone do not guarantee a mathematically uniform grid or a usable game asset.
Triangles and irregular flat planes describe the same face and clothes. Pick this if you prefer a geometric illustration without a pixel grid. It suggests faceted volume, not a 3D mesh; the preset does not provide model files, rigging or editable polygon geometry.
Ink outlines and printed-looking dots emphasize the drawing. The dots are a shading pattern, not an editable pixel grid. Compare it when expression and bold outlines matter more than retro-game blocks. This creates an illustration, not a multipanel comic or a sequence of animation frames.
Two tools can both say photo to pixel art while solving different tasks. Decide which tradeoff you actually need.
AI illustration: interpret the subject Use this preset for a loose retro portrait, pet image or social illustration. Redrawing can reorganize color and detail to create a new picture, so inspect familiar features afterward. You do not select a native grid width, dithering algorithm or exact color count in this flow. Keep the original beside the result for comparison.
Grid converter or editor: control the cells A deterministic converter reduces an image to a selected resolution and palette; an editor lets you repair individual cells. That is the appropriate direction for an exact sprite sheet, cross-stitch or bead chart. This page does not claim those functions. A pixel-looking generated image can still contain uneven cells and extra colors when enlarged.
Prepare a photo that reads after simplification
Think in silhouettes and large color regions before looking for fine detail.
Make the main subject large For an avatar, choose one face with clear eyes, mouth and hair shape. Leave enough margin for the destination's crop without making the head tiny. For a pet, show ears and the distinctive coat pattern. A wide crowd photograph asks a block-based style to represent more subjects than a small icon can explain.
Separate the silhouette from the background A dark coat against a dark wall can merge into a single shape. Choose distinct light or color boundaries instead of relying on texture to separate the subject. Background branches, fencing and small lettering may turn into stray blocks. A simpler source helps you decide whether the resulting silhouette is readable.
Keep important objects uncluttered Glasses, hands, a collar or a familiar accessory should be visible, not hidden by motion blur or filters. Tiny text and logos may be reinvented. If those are essential, preserve the original rather than accepting a decorative redraw as accurate. Crop the input in your usual editor if needed; this preset does not add a manual pixel-retouching workspace.
Check the output at small and enlarged sizes
A lively preview is only the first check. Judge the image where you intend to use it.
Small-size recognition View a version at the actual profile or post size. Can you still identify the subject and expression? Too many similar blocks can erase eyes or merge the pet into the background. The page's illustrative portrait is tall; your avatar may need another crop. Do not assume a circle will preserve everything.
Block consistency Zoom in to inspect stepped edges and whether cell sizes change unexpectedly across the picture. Some AI pixel-style images include soft areas, mixed-size blocks or photographic remnants. If a project requires exact pixels, repair it in a specialist editor or reject the file for that use rather than calling those errors intentional.
Changed anatomy and markings Compare eyes, hands, paws, glasses and distinctive hair or fur against the source. Simplification can legitimately omit detail, but extra fingers, changed markings and invented objects are not faithful conversion. An entertaining illustration is not proof of identity or an accurate product depiction.
File and destination requirements Check the downloaded dimensions, format and crop before sharing. The result is an image, not a palette file, tile map, layered document or animation. Transparency and exact export resolution are not promised here. A sharp-looking enlarged preview does not make it a ready-to-use game sprite.
01Open pixel art already selected The button opens photo filters with the pixel preset. Start with one authorized JPG, PNG or WebP. Look for a simple, well-lit face or animal before adding other sources.
02Confirm filters and current credits Review the selected style and total before submitting. Photos multiplied by selected filters determines the number of results, so adding a comparison changes the total. Use the workspace's current price and available download options rather than expecting a free or fixed-cost conversion.
03Inspect before downloading Compare the small-size silhouette and enlarged blocks with the original. Save only a result that works for your intended decorative use. Keep an editable copy in your own tools if further cropping or cell-by-cell cleanup is needed.
Pixel style is not pixel-level control
AI can alter identity, anatomy, objects, color and composition. The preset does not guarantee a uniform grid, fixed palette, exact cell dimensions, transparency, game-ready sprites, bead patterns or animation. Our illustrations show style directions, not validated live generations. Use a dedicated editor when technical pixel precision is the actual requirement.
Use a photo you can share with the service
Obtain permission when another person appears in your source and avoid private documents or confidential scenes. Generation sends the upload for processing. Finished images are accessible in My Creations, where you can download or delete the record and associated files. Review the privacy policy for the service's handling of uploads; this page does not promise local-only processing or an unverified automatic deletion period.