Give your photo a geometric, low-poly portrait look
Explore angular color planes instead of photographic texture. Open the workspace with Low-poly selected, then use a clear photograph to create a faceted illustration. First decide whether you want a decorative portrait or an editable technical asset: this workflow produces a still image, not a 3D mesh, vector drawing or manually controlled triangulation.
Style illustrations, not verified before-and-after outputs from the live tool. They show a visual direction; your photo may produce different colors, likeness and details.
Choose facets for visual abstraction, not editable geometry
A geometric portrait is useful when you want to reduce a face, pet or scene to striking color planes. Judge whether the main silhouette and familiar features survive that abstraction. The example includes triangles and irregular facets but also smoother facial areas; it does not prove a fixed polygon count or mathematically complete triangulation. If you need an SVG, movable vertices, a printable polygon template or a rotatable 3D model, choose a specialist editor rather than this image-redrawing preset.
Angular facets are different from square blocks and printed dots
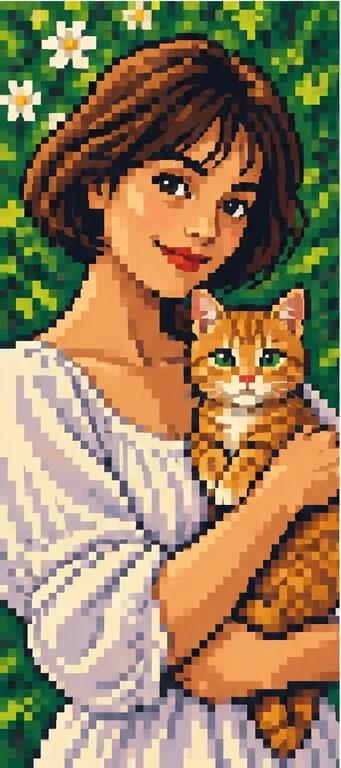
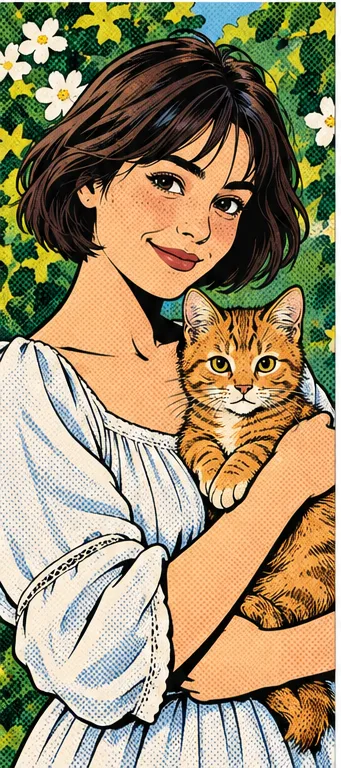
Compare the hair, sleeve folds and cat in three owned reference illustrations. They show different visual structures, not measured quality, customer results or a same-photo generator comparison. Each option opens its own current preset.
Low-poly: angled color planes
Irregular geometric facets describe hair, clothes and the background. Choose this for a graphic portrait with a sense of angular volume. Some areas in the sample remain smoother, so do not expect every surface to become an exact triangle. The image does not contain editable polygon vertices or a hidden 3D object.
Square-looking blocks and stepped edges give a retro-game impression instead of triangular facets. Choose it if that small-block rhythm is your goal. Our AI pixel direction still does not guarantee a fixed grid, palette or game sprite export. Compare the silhouette at small size, not only the number of visible blocks.
Dark drawing boundaries and printed-looking dots emphasize expression without building geometric planes. Consider it if you want a bold illustrated scene rather than a faceted portrait. The dots are a texture, not polygon vertices. This option is also a single image, not a ready-made multipanel story.
Prepare a face that reads through larger color planes
Think about silhouette, directional light and large color boundaries rather than tiny texture.
Separate subject and surroundings Pick visible shoulders, hair edges and a background whose tone differs from the subject. Dark hair against a dark wall can become one ambiguous plane. For a pet, preserve ears and the main fur pattern. The same simplification that looks striking can erase a small but important identifying mark, so decide which details you cannot afford to lose.
Use readable lighting A clearly lit face offers useful differences between cheeks, nose and hair. Harsh shadows can hide an eye and flat overexposure can remove the shape information you want the illustration to express. Avoid expecting the preset to recover missing features. You do not get controls to place vertices, change facet density or manually repair the geometry in this flow.
Give the crop room Leave space around the head or animal's ears before converting. A triangular background can be visually active; a portrait that is tiny within it may not work as a profile icon. If you need a simpler composition, prepare a cropped copy in your normal editor while keeping the original. A tall example on this page does not guarantee the right avatar shape for your destination.
Check abstraction without accepting accidental distortion
Geometric style is a choice. Invented anatomy or an unrecognizable expression does not have to be accepted as part of it.
Face and silhouette Compare eye direction, mouth, jaw, hairline and the outline of ears with the photograph. A plane boundary can accidentally read like a scar, extra facial feature or changed expression. Decide whether a looser likeness is appropriate for your personal artwork. If exact identity matters, keep the real photo rather than describing a faceted redraw as a faithful record.
Planes, gradients and photographic remnants Zoom in to see whether sharp facets sit beside smooth skin, blurry patches or detailed photographic areas. The sample itself has this variation. It can be acceptable for an illustration, but it is not evidence of an all-triangle conversion. If your project requires consistently flat triangular regions, use a dedicated triangulation editor with explicit geometric controls.
Small-size recognition Reduce the image to the actual profile or post size. Do eyes and the pet's muzzle still separate from the surrounding planes? Similar colors can merge after compression. Check a circular crop on your phone as well as the large preview. If the background dominates, use another source with clearer subject separation instead of assuming more facets will solve readability.
Know which file you are getting
Low-poly describes an appearance here, not a guarantee about the internal structure of the output.
Raster illustration versus SVG or mesh Inspect the downloaded dimensions and file type. A raster image stores pixels; you cannot select its visible triangles as separate vector shapes or rotate the depicted person. This preset does not export SVG paths, OBJ, GLB, rigging or a physical model. A thumbnail with a three-dimensional impression is still a flat picture.
Decorative prints and accurate depiction For a gift or personal graphic, test a small print before ordering a large one and allow for the destination's crop. Do not treat facet style as proof of print resolution. Product labels, text and distinguishing markings may change, so use an original photo when accuracy is the task. Obtain permission for other people's portraits; creating a geometric version does not remove those responsibilities.
01Open Low-poly and upload The button selects Low-poly in the photo-filter workspace. Start with an authorized JPG, PNG or WebP with a clear silhouette and keep the original for review.
02Review style and credits Confirm the preset and current total before generating. Photo count multiplied by selected styles determines result count. Additional attempts can cost credits; no free or unlimited output is promised here.
03Check the image, then save Inspect likeness and facets at full and small sizes, then check the downloaded format. Save it as an illustration; use a dedicated editor if your task requires vectors or a 3D model.
A faceted image is not a technical polygon asset
The redraw may change identity, proportions, colors and objects. It does not promise exact triangles, fixed facet counts, editable vertices, SVG, a 3D mesh or accurate product detail. These examples explain an appearance and are not verified customer generation results. Keep the source photo and check whether abstraction suits your actual use.
Use a photo you can share with the service
Upload only photos you may authorize the service to process, with permission from other people shown. Avoid sensitive documents. Generation sends the image for processing, not local-only editing. Finished work can be viewed and downloaded in My Creations; removing a completed record hides it from your user history but is not a promise of immediate erasure from administrative records, providers or backups. Read the privacy policy and contact [email protected] for a data-deletion request. Review images before sharing, especially when another person or a child appears.