Want dark ink contours, graphic color and a printed-comic feeling? Start with a photograph you can use, compare the three illustrations below, then open the workspace with Comic selected. This is an AI redraw of one still image, not a page-layout tool or a story generator. You can explore a portrait or pet illustration without drawing it by hand, but the face, pose and small objects may change.
Style illustrations, not verified before-and-after outputs from the live tool. They show a visual direction; your photo may produce different colors, likeness and details.
Choose a comic look for bold shapes, not a complete comic book
Use this direction for a single expressive profile picture or illustrated scene. Look for a strong silhouette and readable expression before judging the dots. Our reference is a color comic, not a black-and-white manga page. If you need speech bubbles, accurate captions, panels in sequence or the same character across a story, plan a separate editing workflow. Comic styling can help a photograph become an illustration; it does not supply those publishing functions or guarantee a faithful portrait.
Ink and dots, soft anime, or graphite?
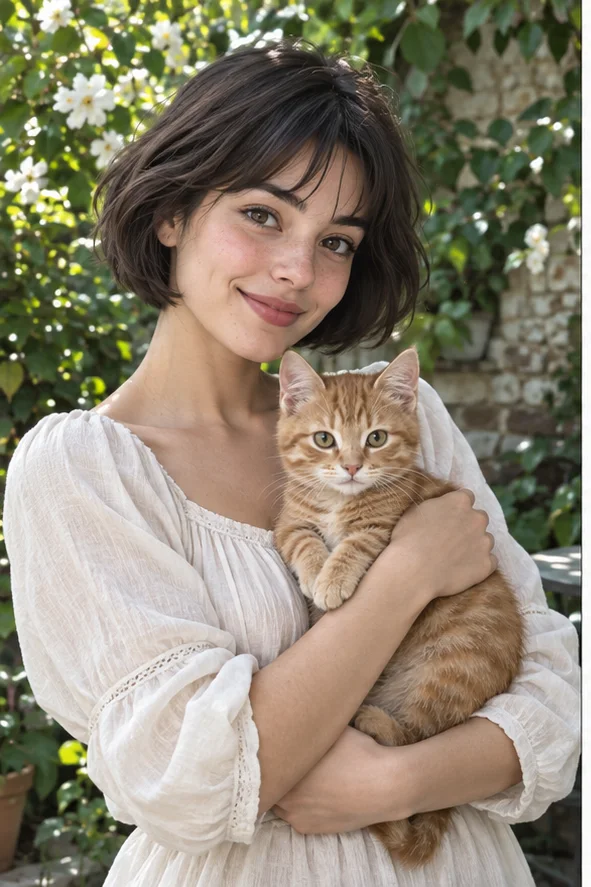
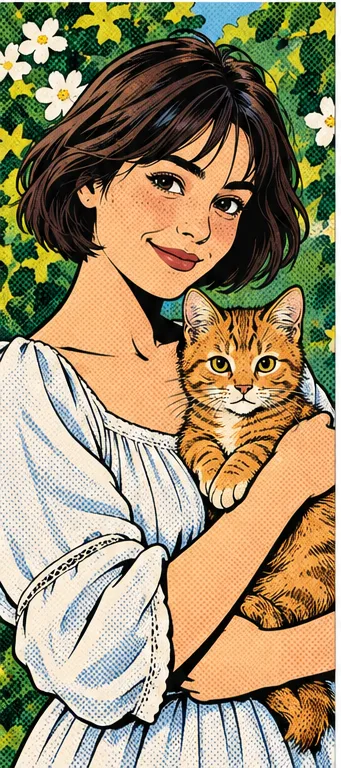
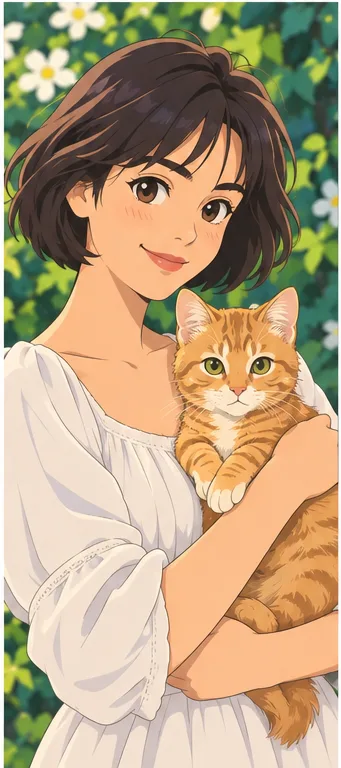
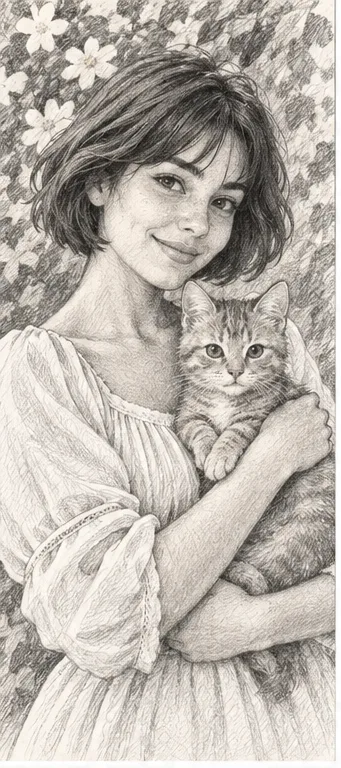
These owned illustrations use a similar woman-and-cat reference to explain three different choices. They are not customer results or a same-condition quality test. Notice the face, sleeve edges and background rather than only the overall palette.
Comic: contours and printed dots
The hair, sleeves and cat have strong black boundaries; small dots cover shaded regions. Choose this when you want an assertive graphic illustration. At avatar size, dense dots can overwhelm eyes or skin. Check whether the expression survives, and do not assume every result includes uniform, adjustable halftone spacing.
Larger illustrated eyes and smooth color areas create a softer character portrait. Compare this when printed texture is distracting or you prefer a gentler face. It can change eye shape, age expression and hair, so it is not simply the comic picture with the dots removed.
Graphite shading keeps the focus on light and dark rather than bold color and printed texture. It suits a sketch-like portrait. It is not a ready-to-color outline: gray shading can fill spaces you wanted to leave blank. Choose the coloring-page guide instead if your real goal is hand coloring.
A comic redraw simplifies some details and emphasizes others. Choose the information you want the picture to communicate.
Give the face or pet room Use a clear subject, visible expression and enough margin around hair, ears and shoulders. Tiny faces in a crowd leave little information for an expressive illustration. For a pet portrait, show the muzzle, ears and recognizable coat markings. Start with one well-framed photograph instead of expecting a busy group scene to preserve everyone equally.
Avoid competing edges Fences, dense branches, patterned clothes and small labels can become additional ink lines. A simpler background makes it easier to see which contours belong to the subject. A dark sleeve against a dark wall may merge. You may crop your source in another editor first; this preset does not provide manual outline cleanup or selective dot controls.
Keep text outside the redraw Add a name, quotation or event message later in a tool that can set actual text. Generative drawing may invent letters, logos or numbers rather than copy them. If accurate signage or a product label is essential, retain the original photograph for that job. A colorful illustration is not evidence that the wording remains correct.
Check the picture before calling it finished
Read the whole composition first, then inspect the places where decorative texture may hide errors.
Expression and familiar details Compare eye direction, mouth, glasses, hands, paws and the pet's stripes with the original. Ink can make an invented feature look deliberate. If a familiar person or animal no longer reads as intended, reject that result instead of accepting it because the drawing is attractive. The tool cannot promise an identical face.
Dots at the actual display size Preview the picture at the size of your profile icon or post. Fine halftone may disappear or become noisy after a platform compresses the upload. Keep space for its crop and check again on a phone. This flow does not let you specify screen frequency, print ink separation or a technically exact comic-print pattern.
Background and object count Look for added flowers, missing straps, extra fingers or a changed object behind the subject. Simplification may be acceptable for a decorative portrait, but invented details are unsuitable for an accurate product or documentary image. Save the untouched source separately so a stylized version never replaces the only reliable record.
Use the illustration for the job it actually supports
One comic-style image can be a useful starting point without being a complete publishing asset.
Profile image or personal post Check the destination's crop and whether your face is readable in a small circle. Keep the image clearly presented as an illustration. Ask permission before sharing someone else's portrait. Do not use a stylized likeness to suggest that a real person made a statement or endorsed a product.
Prints, invitations and story projects Inspect the downloaded format and pixel dimensions, then try a small print before ordering anything large. Set captions and panel borders in your usual editor. This preset outputs a picture, not editable ink layers, vectors, animation or a consistent multipanel cast. It cannot clear rights to a copyrighted character, logo or another person's photo.
01Open Comic, then upload The button selects Comic in the photo-filter workspace. Use a permitted JPG, PNG or WebP with a clearly framed subject; keep the original for side-by-side checking.
02Check your selection and total Confirm Comic and the current credit total before submitting. Adding photos or other styles increases the result count. Login, credits and download conditions are handled in the workspace, not promised free here.
03Review the inked result Check expression, hands and texture at full and small sizes. Save only a version suitable for your intended post; add accurate text or a layout separately if needed.
Comic styling is not storytelling or exact reproduction
AI may change anatomy, identity, text, colors and background. This is a static raster illustration, not a complete comic book, animation or editable vector drawing. No named studio or character style is guaranteed. The illustrations explain a visual direction and are not verified production outputs from a customer photo.
Use a photo you can share with the service
Upload only photos you may authorize the service to process, with permission from other people shown. Avoid sensitive documents. Generation sends the image for processing, not local-only editing. Finished work can be viewed and downloaded in My Creations; removing a completed record hides it from your user history but is not a promise of immediate erasure from administrative records, providers or backups. Read the privacy policy and contact [email protected] for a data-deletion request. Review images before sharing, especially when another person or a child appears.