AI image generator
Give your product a scene worth exploring
Create a scene with my product photo ↗Start with a clear photograph of the item you actually sell, then describe the surface, background and light around it. A restrained studio setting can make an amber bottle feel warm, tactile and easy to notice. This is a generative product visual, not a pixel-preserving cutout: choose it for creative scenes and campaign concepts, and retain an authentic photograph when the buyer must inspect exact packaging or condition.
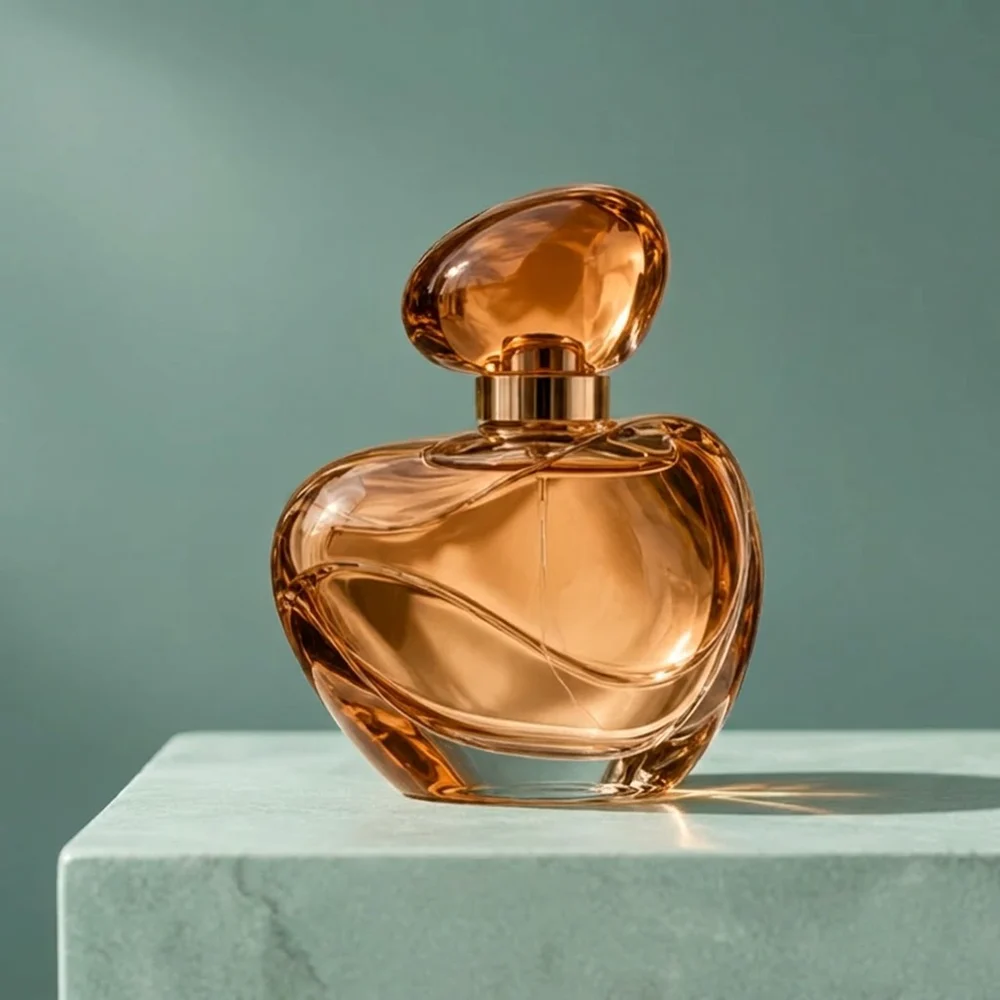
Choose a reference-led scene when the product itself is the starting point. Use background removal instead when you only need the original item on a transparent or plain background. A generated setting can reinterpret edges, reflections and label details, so the decisive question is not which scene looks most expensive, but whether the result still represents the real item honestly.
Start with a real example
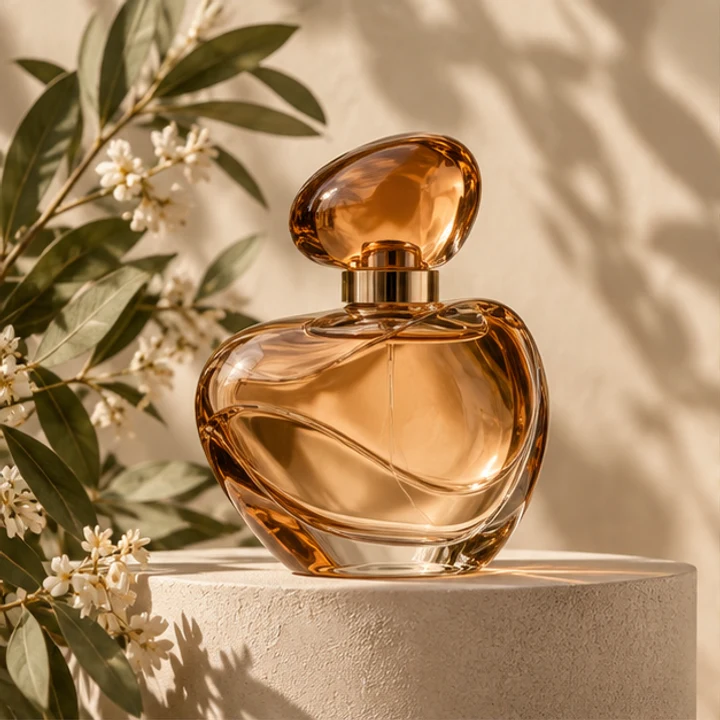 Reference imageGenerated example
From your idea to a finished image
Prepare
Photograph the full item in even light, with the closure and important edges visible. Remove temporary stickers and avoid a hand covering the silhouette. Keep a separate close-up of any real label; this example intentionally contains no label text.
Choose
The example opens Nano Banana Pro with a square composition and an editable local-language brief. Upload your own product reference in the workspace. Use one clear main image before adding additional visual instructions.
Create
Open the workspace, review the selected model, image settings and current credit estimate, then submit when ready. The link does not upload a sample or start a paid job. Each new generation is a separate request; an eligible failed task returns its charged credits. Keep the original files before experimenting.
An editable starting prompt
Use image 1 as the product reference. Keep the rounded amber perfume bottle, oval cap, gold collar, recognizable silhouette and glass. Place it on pale seafoam stone against muted teal, soft window light from the left and natural contact shadow. Remove flowers and leaves. No labels, text, people or logos. One square studio photograph.
Choose the setting for the buying question
A clean studio scene answers shape and material questions. A lifestyle scene answers where the item might belong. An atmosphere-led scene works for a launch or social post, but is a poor substitute for a precise catalogue record. For a small glass bottle, a quiet plinth and muted background let the silhouette remain readable. A crowded bathroom shelf can misrepresent the product size or suggest that decorative accessories are included when they are not. Decide whether the image will be a creative secondary visual, a mood board or a sales listing before adding props. The context should explain a use or feeling without changing what is being offered.
Describe light and contact, not only a style
A useful scene brief states the support surface, direction of light, background color and placement of the product. These instructions make the composition concrete. In the example, warm amber glass contrasts with a pale seafoam base and a darker teal wall. The contact shadow connects the bottle to the plinth instead of making it float. Start with a single light direction and a small number of materials. Asking simultaneously for bright window light, dark dramatic shadows and a glowing outline creates a confused lighting brief. Keep creative direction consistent, then adjust one element at a time.
Keep a product identity checklist beside the reference
List the features a viewer uses to recognize your product: cap shape, body proportions, handle, seams, material and visible color. Compare those features against the reference rather than accepting a polished image immediately. Transparent glass is particularly sensitive because refraction can make the model invent an extra ridge, alter the fill line or change the thickness of the bottle. For apparel, compare the real cut and closures. For used goods, do not erase a meaningful defect from a sales representation. Creative staging can support presentation; it must not become a promise about a different product.
Prepare versions without pretending to shoot new angles
Keep the same reference and record the scene description when comparing a few backgrounds. Name the saved images by their intended use, such as a square launch card or a neutral campaign concept. A request for a different camera angle may invent a side that your photo never shows. If a real side view matters, take that photograph instead. To add space around an existing finished image while protecting its source region, consider the dedicated image extender. To replace a local prop, use the image editor rather than rebuilding the whole product scene. These are different jobs and should not be mixed into one vague prompt.
Use the result as a visual, not a layered catalogue file
This workflow produces an image, not an editable product catalogue, a layered design project or an automatic listing upload. Keep exact logos, required warnings, dimensions and claims in an editing workflow where you control their final presentation. An attractive generated image does not establish platform compliance or commercial rights to someone else's brand. Use a photograph you own or have permission to process. Before publishing, inspect the downloaded result at its actual size and check the current requirements of the destination. Keep the original and approved version together so the product description and image do not drift apart.
What this workflow does and does not deliver
- Match the cap, silhouette and material against the real product.
- Check the supporting surface and shadow for believable placement.
- Do not infer included props, accurate labels or platform approval from this example.
Editorial method: task-specific guidance checked against the current workspace and site-owned model examples. Examples were generated on October 7, 2026, at the 1K setting; they are not customer testimonials, competitor results or proof of universal performance.
Reviewed October 13, 2026
Privacy and image deletion ↗