Add an object to a photo

Draw where it belongs. Give your photo a new detail.

Add a vase or a small prop to your photo. Draw its position and rough shape in Sketch edit, and optionally add a description. Your drawing guides the placement; AI creates the object inside the scene.

One source photo · Drawn placement · Credits checked before generation

AI result
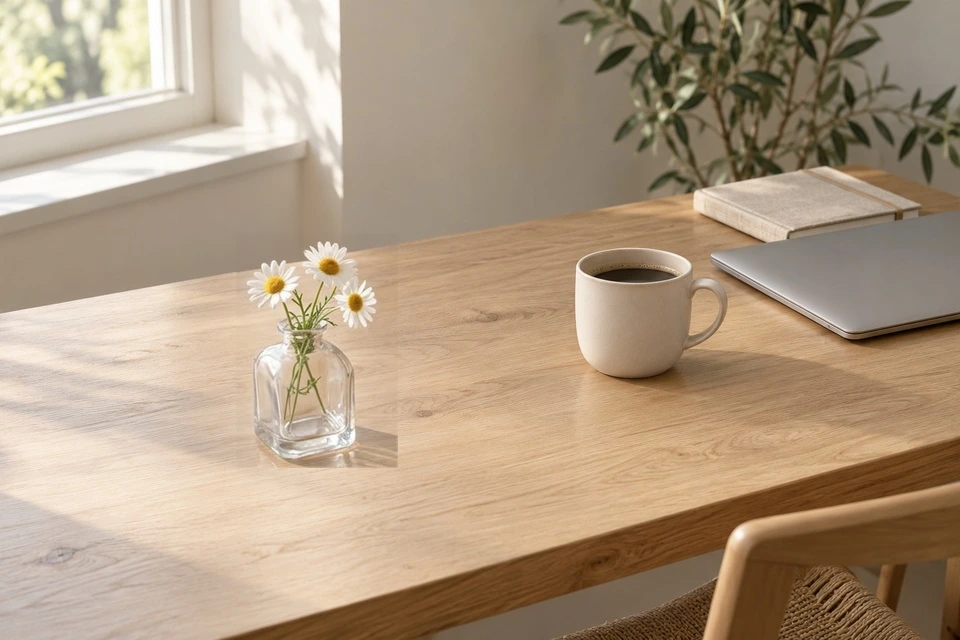
AI editing result with a glass vase and white daisies added in the drawn position
A simple drawing becomes a vase of flowers
Add an object to a photo

A simple drawing becomes a vase of flowers

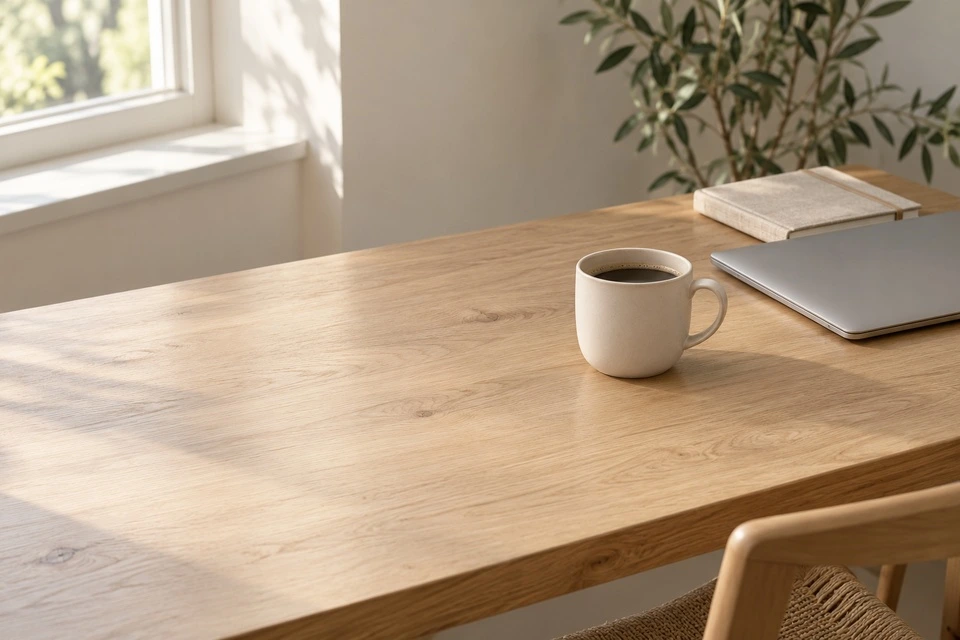
Original sunlit desk with a cup, notebook and laptop, before adding flowers
01Source image
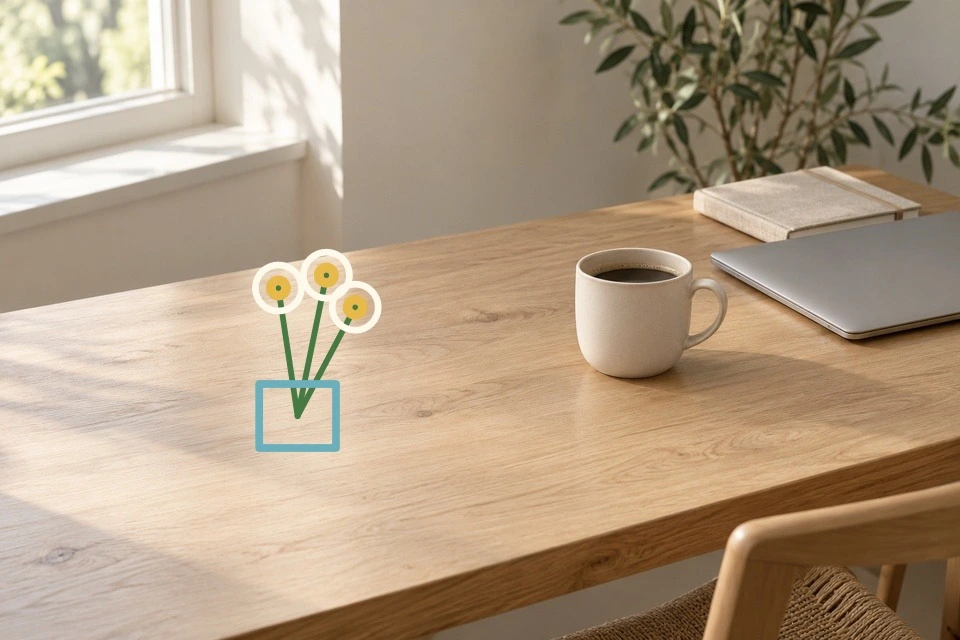
A coloured outline of a vase and three flowers drawn on the left side of the desk
02Drawn guide

Real local Sketch edit example, reviewed October 2026: a drawn vase-and-flower guide became a glass vase of daisies. The outline is a user guide, not part of the finished object. This single test illustrates placement, not exact drawing fidelity or a guarantee for every photo.

Try this starting point ↗

From your photo to a checked result

  1. 01

    Choose a photo with space for the new object

    Upload your photo and keep the original. Clear perspective and a visible supporting surface help you judge whether the addition fits.

  2. 02

    Draw the position and rough shape

    Sketch the silhouette where you want it. Add a short object description if needed; the drawing is required, while text is optional.

  3. 03

    Confirm the cost and inspect the result

    Check the estimate and balance before submitting. Compare size, contact shadow and nearby details before keeping or downloading a version.

Decide what to add, then give it room

01

Add something new, rather than replace what is there

Sketch edit suits a new prop in an available part of the photo. Draw the object's footprint and height relative to the cup or notebook. If an existing cup must become a plant, brush replacement gives that different task a clearer region. If the area should be empty, use removal instead.

02

A rough silhouette is enough to start

You do not need an accurate illustration. A base, stem and flower heads can communicate location and approximate size. Keep the drawing off a face, hand or lettering you want to retain. A broad scribble can be interpreted in several ways; simplify the shape before asking AI to fill in materials and detail.

03

Describe the object, material and relationship to the scene

A short glass vase with white daisies on the desk is more useful than make it beautiful. Add scale or natural window light when it matters. The description supplements the drawing; it cannot import a particular branded product or guarantee exact dimensions. The result should be judged against the photograph, not just the wording.

04

Look for the physical clues that make it fit

Check that the vase rests on the desk, the perspective follows the camera, and the shadow agrees with the window light. Compare the cup, notebook and background too: Sketch edit preserves the working photo outside the displayed dashed bounds. Inside that box, background between your drawn lines can also change. Processing may resize the original and blend the boundary, so this is not a camera-file pixel-match promise. Revise the sketch or description from the original if the object floats or overlaps something important.

Add an object to a photo

An editable starting prompt

An editable starting description, not the recorded request for the example. The link selects Sketch edit and fills this text; upload your own photo and draw your own guide. No sample photo is imported.

A small clear glass vase with three white daisies, standing on the desk in the drawn position. Match the existing window light and perspective; keep the cup, notebook and laptop.

Try this starting point ↗

Check before keeping the result

  • The new object sits in the intended position and fits the available space.
  • Its base, perspective, light and shadow agree with the scene.
  • Nearby objects, faces and text were compared with the original.
  • The invented object is suitable for the image's intended use.

Review the cost before generating

Sign in and check the current estimate and balance in the workspace. Each submission uses credits. An insufficient balance or a failed balance check stops submission; failed tasks return their reserved credits. A new attempt has its own cost.

References and instructions are sent to the generation provider. Saved records can be deleted from your account; storage and retention details are in the privacy policy.

Before you start

Must I draw, or can I use text alone?

This path selects Sketch edit, which requires a drawing; the description is optional. For a change expressed only in words, use the separate text-instruction page.

Is this the same as turning a photo into a pencil sketch?

No. Your drawing becomes a new object inside the source photo. A pencil-sketch filter changes the appearance of the existing image.

Can I insert my exact product from another photo?

This flow takes one source photo, a drawing and optional words. It does not provide a second product-reference slot or promise exact packaging, lettering or dimensions.

Will everything outside the drawing stay identical?

The editable area is the displayed bounding box, not just the coloured lines. Outside that box the working photo is preserved, with boundary blending; the working photo may be resized. Keep important faces, hands and labels outside the box and check the result.

Page and workflow reviewed October 14, 2026. Example provenance is described in the captions.

Draw where it belongs. Give your photo a new detail.

One source photo · Drawn placement · Credits checked before generation

Add an object to my photo ↗