Small prop with material and light
A small green succulent in a terracotta pot, natural window light.
Replace an object in my photo ↗
Turn a distracting cup into a small plant without starting a new image from scratch. Upload your photograph, choose Brush and replace, paint the region and describe what should appear there. The selection supplies the location; your words supply the object. This is local photo editing, not a catalogue of exact replacement products.
One photo at a time · No installation · Check credits before generating
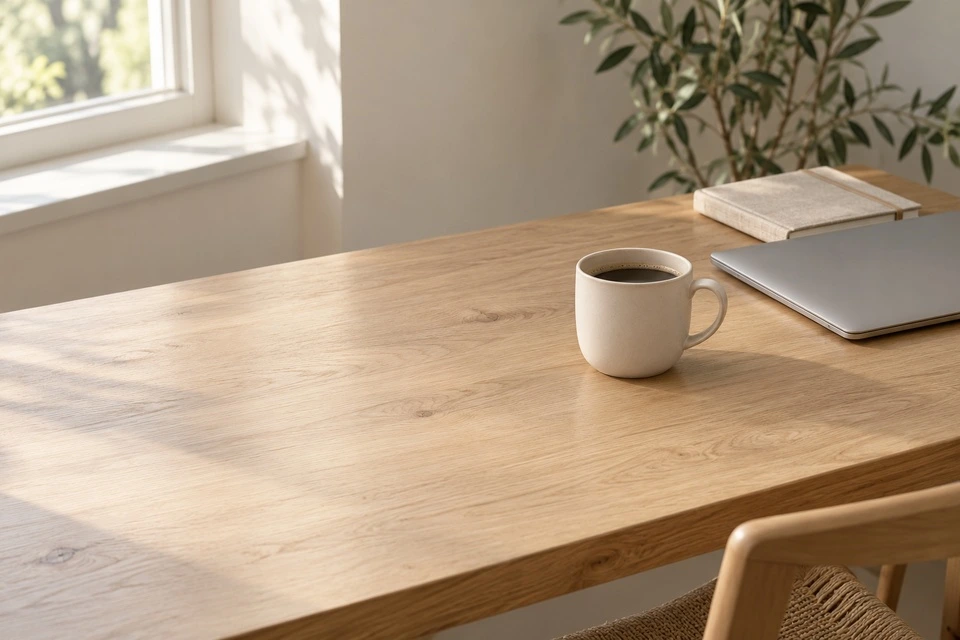 Original
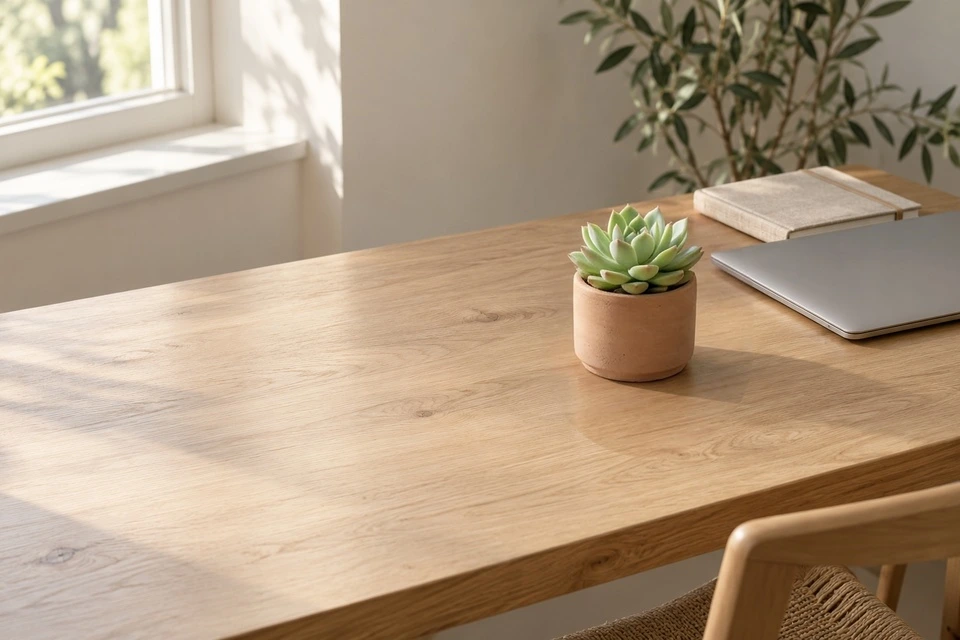 AI edited
Choose a JPG, PNG or WebP, or reuse one from recent uploads. Keep a copy of the original.
Mark the area and describe its replacement. A small succulent replaces the cup here. Specify the object, material and scale so it fits the scene.
The floating bar shows the estimate and balance. You need to sign in and have sufficient credits. Once submitted, you can submit another task.
Check the result against the original, inspect edges and faces, and download the version you want. Saved tasks are available in My Works.
A small green succulent in a terracotta pot, natural window light.
Replace an object in my photo ↗A short matte ceramic vase standing on the desk, viewed from the same camera angle, soft daylight and a subtle contact shadow.
Replace an object in my photo ↗Object replacement is useful for trying a decorative prop or changing a small scene detail while keeping a photograph as the base. It differs from erasing, where the selected region becomes background, and from text editing, which can affect the whole picture. Pick replacement when you can point to one region and describe a clear new object. For a new scene without an existing photograph, the image generator is the more appropriate starting point.
Paint the old object and leave room for the new silhouette. A plant may be taller and wider than a cup; selecting only the cup's narrow centre can constrain the leaves or leave part of the handle behind. Keep the person's hand, the computer and important writing outside the brush region. The edit changes what you painted, including any background inside that region. It cannot place a large object beyond the available selection while preserving everything there.
Name the object first, then its visible material, size and relationship to the scene. A small green succulent in a terracotta pot gives clearer direction than make this beautiful. Add natural window light or a matte surface when those details matter. You do not need a long list of unrelated style words. A replacement description is required in this mode; for removal without a new object, switch to Free erase rather than asking for an invisible substitute.
A pot on a desk needs a base that appears to touch the surface, a sensible viewing angle and a shadow consistent with the room. Compare its size against the notebook and the person's hand, not just against the removed cup. A plausible object can still look pasted on if the camera angle or contact shadow is wrong. Describe the surface and viewpoint when necessary, then judge the resulting placement rather than assuming the words were followed exactly.
Trying a generic plant, vase or decoration can help explore a visual idea. It does not prove how a specific item for sale looks, nor certify the dimensions or colour of a real product. The current flow uses your photo and a text description; this page does not promise importing a second product photograph for an exact swap. Avoid presenting an invented replacement as an authentic product photograph when buyers need factual detail.
Check for pieces of the old cup, leaves clipped at the selection boundary, duplicated stems and impossible overlaps with the hand. Inspect the bottom edge: the new object should not float. Then compare the surrounding notebook and laptop. Brush edits preserve the working image outside the selection, not an unprocessed full-resolution source; resizing and boundary blending are part of the workflow. If you need a broader rearrangement, choose text instructions and accept that their scope is different.
If the first plant is too tall, adjust size wording while keeping the material and lighting consistent. If it does not fit the marked space, revise the selection. Changing the region and several prompt details together makes it harder to know what improved the result. Each submission is a separate task with its own displayed cost; alternative generations are not automatically included for free. Save the version that meets your purpose rather than treating endless retries as a quality guarantee.
Object replacement does not output a transparent cutout simply because an object was removed first. Use the background remover for a separate asset, the enhancer for size or clarity, and photo filters for an overall artistic treatment. Finish the local swap before those transformations so you can inspect the seams on the unstyled picture. Keep the original and edited export separately, and describe meaningful changes when a photo is being used to document something real.
Generation requires login and sufficient credits. Check the estimated cost before each submission; extra attempts are separate tasks. Download access follows your plan. Uploaded material is processed by the generation service. Saved tasks can be deleted from your account; see the privacy policy for retention and deletion details.
Privacy and deletion ↗Generative fill is a broader term for creating content in an area. This page focuses on the narrower task of replacing one object using a brush region and text. It does not promise every feature offered by desktop software using the same term.
This guided replacement flow takes one source photograph and a written description. It does not provide a second reference-image slot for an exact product swap. Describe generic attributes and verify the output; use another workflow when exact identity is essential.
The brush region controls the local scope. A concise description of the new object is the primary instruction. For protected details, keep them outside the marked region; don't paint over a face and expect a sentence to restore it perfectly.
One photo at a time · No installation · Check credits before generating